7 Best Fixes Why Do Home Repairs Keep Failing After Fixing?

Time:2026-09-18 Author:Charlotte
0%

Home repairs should solve problems, not create a repeating cycle of patching, repainting, and replacing. Yet many homeowners still ask, “why do home repairs keep failing after fixing?” The answer often hides beneath the visible damage. A fresh coat of paint cannot stop moisture behind drywall. New tiles may crack when the subfloor moves. A repaired pipe may leak again when pressure, corrosion, or poor connections remain unaddressed.

Mike Holmes, a respected contractor and renovation expert, offers a useful warning: “If you think hiring a professional is expensive, wait until you hire an amateur.” His statement reflects a common repair mistake. Homeowners may choose the cheapest fix without checking the original cause, materials, or installation method. That decision can turn a small issue into stained ceilings, soft flooring, or damaged framing. Sometimes, even professionals miss clues. I have seen repair plans fail because nobody tested moisture levels or inspected nearby structures. That deserves honest reflection.

This guide explores seven practical fixes for why do home repairs keep failing after fixing. It examines poor diagnosis, rushed workmanship, incompatible materials, hidden water damage, and weak maintenance habits. Each section focuses on visible details and realistic prevention steps. Look for bubbling paint, musty odors, loose trim, uneven floors, and recurring cracks. These signs are not merely cosmetic. They may reveal movement, moisture, or an unfinished repair. A durable solution begins with patience, careful inspection, and the willingness to correct an earlier mistake.
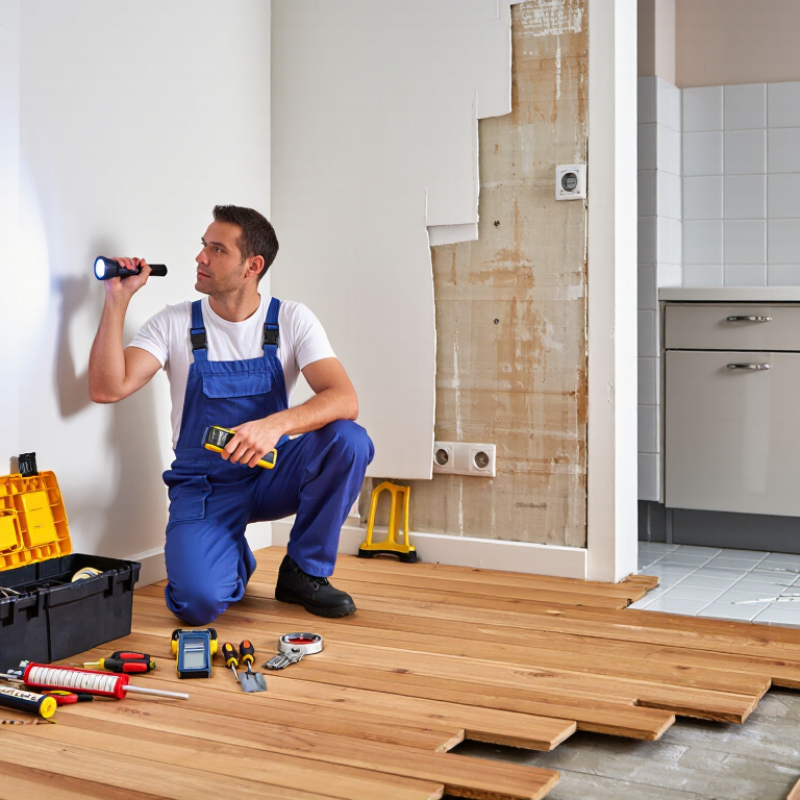
7 Best Fixes Why Do Home Repairs Keep Failing After Fixing?

Why Home Repairs Fail Repeatedly After They Seem Fixed

Home repairs often fail because the visible damage is only a symptom. A fresh paint layer may hide a ceiling stain, but it cannot stop a slow roof leak. A tightened pipe fitting may still drip when water pressure changes. I have seen hairline cracks return across a repaired wall within weeks, usually because the framing continued to move.

Moisture is a frequent hidden cause. Check damp baseboards, soft flooring, peeling paint, and musty odors before repairing surfaces. Use a moisture meter when possible, and inspect nearby plumbing, windows, gutters, and exterior joints. Proper preparation also matters. Dust, loose material, or trapped moisture can prevent adhesive, compound, and sealant from bonding correctly. Some repairs fail because different materials expand at different rates.

Small details matter.

A reliable repair should include diagnosis, suitable materials, and enough curing time. Do not judge success only by appearance. Run the fixture, observe the area during rain, or check the wall again after temperature changes. Keep dated photos and short notes about what was repaired. This helps reveal patterns that memory misses. I once trusted a smooth patch too quickly and ignored a faint damp smell. That mistake delayed the real repair. When the same problem returns, stop repeating the surface fix and reconsider the cause, preparation, and surrounding structure.

How to Identify the Root Cause Behind Recurring Repair Problems

Recurring home repairs often fail because visible damage is not the real problem. A damp ceiling may point to a roof gap, blocked gutter, or hidden pipe leak. I learned this after repainting a stained ceiling twice. The stain returned within weeks. Water was traveling along a joist before appearing indoors.

Start with evidence, not assumptions. Photograph the area after rain. Note smells, sounds, timing, and temperature changes. A repair diary can expose patterns that memory misses. Check moisture with a meter, inspect nearby joints, and test drainage safely. Look behind access panels when possible. Do not seal a surface until it is dry.

Many quick fixes trap moisture and encourage mold growth. Cracked grout may reflect movement beneath tiles, not poor cleaning. A loose outlet may signal damaged wiring or an overloaded circuit. For electrical, structural, gas, or persistent water issues, use a qualified professional. Their inspection should explain the cause, not only recommend replacement. Ask what evidence supports the diagnosis. That question matters.

The most reliable fix matches the failure mechanism. Replace a damaged seal, correct the slope, improve ventilation, or reinforce movement-prone materials. Use compatible materials and follow curing times. Rushing is expensive. I also review my own repair choices. Sometimes the first diagnosis was convenient, not accurate. If the same defect returns, stop repeating the patch. Open a small inspection area, compare old and new damage, and reassess the surrounding system.

7 Best Fixes: Why Do Home Repairs Keep Failing After Fixing?

How to identify the root cause behind recurring repair problems

What the chart shows

The diagnostic priority index ranks the root causes most likely to make a repair fail again. Moisture entry and incomplete drying should be investigated first, followed by structural movement, incorrect installation, blocked drainage or ventilation, and deferred maintenance. These are evidence-based troubleshooting priorities, not population percentages. A durable repair requires correcting the source of the damage, not only replacing the visible surface.

Seven Common Reasons Home Repairs Do Not Last

A failed repair often begins with a wrong diagnosis. A stain may come from a roof leak, not a damaged ceiling. Covering the mark hides evidence, while water keeps moving. Incompatible materials create another problem. Fresh plaster can crack over dusty, flexible, or damp surfaces. Rushed workmanship is a third cause. Thin sealant, loose fasteners, or skipped curing time may look acceptable for a week. Then failure returns.

Moisture is the fourth reason. Bathrooms, basements, and exterior walls need proper drying, drainage, and ventilation. I have seen paint peel because the surface was coated before it felt fully dry. Structural movement is fifth. Settling, vibration, or seasonal expansion can reopen a joint repaired correctly. A flexible joint may be needed instead of a rigid patch. This detail is easy to miss.

The sixth reason is neglected maintenance. A blocked gutter, overflowing drain, or unsealed window can defeat good repair work. The seventh is choosing a method beyond the worker’s training. Electrical, structural, and hidden plumbing problems deserve assessment by a qualified professional. Clear photographs, moisture readings, and a written repair scope improve reliability. Still, no inspection is perfect. Unexpected damage behind a wall can change the plan after opening it. Leave access panels where future checks are sensible.

7 Best Fixes: Why Do Home Repairs Keep Failing After Fixing? — Seven Common Reasons Home Repairs Do Not Last

No. Common Reason Typical Warning Signs Underlying Cause Durable Fix Suggested Review Period Priority
1 The visible damage was treated, not the source Recurring stains, peeling paint, damp odors, or repeated leaks in the same area A roof leak, plumbing leak, drainage problem, or foundation moisture path remains active Trace the problem to its entry point, correct the source, dry affected materials, and replace materials that have lost their integrity After the next heavy rain or plumbing use High
2 Moisture was trapped behind the repair Bubbling paint, mold-like growth, soft drywall, musty smells, or swollen trim Wet materials were sealed before they fully dried, or ventilation was inadequate Find and stop moisture, remove unsalvageable porous materials, dry the cavity, improve ventilation, and then refinish Within 24–72 hours after a leak High
3 The repair materials were incompatible Cracked joints, peeling coatings, discoloration, or sealant separating from the surface The new material cannot bond, expand, contract, or tolerate moisture in the repair location Match the material to the substrate and conditions; follow compatibility, curing, and temperature requirements At installation and seasonal changes Medium
4 The surface was not properly prepared Patch edges show through, paint flakes, tiles loosen, or filler cracks around the repair Dust, grease, loose material, rust, old sealant, or an unstable surface prevented proper adhesion Clean, dry, scrape, sand, prime, and stabilize the surface before applying the final repair material During the first 30 days Medium
5 Normal movement was ignored Cracks reopen at corners, joints, door frames, ceilings, or transitions between materials Wood expands and contracts, buildings settle, or different materials move at different rates Use an appropriate flexible joint or reinforcement system, and investigate cracks that are wide, growing, or accompanied by sticking doors Every 3–6 months Medium
6 The repair was applied incorrectly Uneven surfaces, weak joints, premature cracking, leaks, or fast wear after installation Incorrect thickness, poor fastening, inadequate curing time, wrong tool, or skipped installation steps Follow the product and building requirements, use the correct tools, respect curing times, and test the repair before closing the area Immediately after completion High
7 The underlying system is near the end of its service life Multiple failures, widespread corrosion, repeated plumbing issues, or repairs needed in several locations Aging roofing, plumbing, electrical, drainage, or structural components are failing beyond one isolated defect Compare the cost and risk of repeated patching with targeted replacement or a complete system upgrade Annual whole-system inspection High

Practical rule: A repair is more likely to last when the source of the damage is corrected, the surface is prepared, compatible materials are selected, and the completed work is checked under normal conditions.

Step-by-Step Methods for Creating Durable Home Repair Solutions

Repeated failures usually reflect hidden causes, not bad luck. Durable repair begins with diagnosis.

Fix 1: photograph the damage before opening walls.

Fix 2: test moisture with a meter, not touch.

EPA WaterSense estimates household leaks waste nearly one trillion gallons annually in the United States. Small drips deserve serious investigation.

Fix 3: remove failed material completely. A damp patch under fresh paint remains a warning.

Fix 4: match repair materials to the substrate. Use compatible fasteners, sealants, and patching compounds.

Fix 5: correct the water path before sealing anything.

Fix 6: respect curing time, temperature, and ventilation requirements.

Harvard’s Joint Center for Housing Studies reported 472 billion dollars in homeowner improvement spending during 2022. That scale rewards written scopes, itemized costs, and documented tests. Shortcuts are expensive.

Fix 7: verify performance after repair.

Run water near a window, inspect beneath a sink, or check the wall after rainfall. Record the date and result.

An infrared camera can reveal cold, wet areas that look normal. A checklist helps, but it is not perfect.

A first inspection may miss a hidden leak. That is an uncomfortable limitation. Durable work also needs follow-up.

When the repair involves electricity, structural damage, or persistent moisture, use a qualified professional and request clear test results.

When to Hire a Professional for Persistent Home Repair Failures

Home repairs often fail because the visible problem is not the real cause. A damp ceiling may come from a loose roof detail, not bad paint. A recurring wall crack may signal movement, moisture, or weak preparation. Fresh paint hides damage briefly. It does not solve it.

When the same leak, crack, or odor returns, stop repeating surface fixes. A professional should inspect the source, surrounding materials, and previous repair work. Hire one when water reaches wiring, floors feel uneven, mold keeps returning, or a repair fails twice. Electrical faults and structural movement need trained assessment. Guessing can make the damage worse.

Tips: Keep a repair record with dates, photos, and materials used. Note when the problem appears, especially after rain or temperature changes. Ask for a written diagnosis, repair scope, and expected result. A reliable professional explains the cause before discussing price. They also check nearby damage instead of replacing only the damaged section. Homeowners sometimes choose the cheapest quick fix, and that choice can create extra work later. I would question any solution that promises instant results without inspection. Persistent failures deserve patience, evidence, and qualified help.

FAQS

Why does a repaired wall crack again?

The visible crack may hide movement in the framing. Different materials can also expand at different rates. Small cracks return. Remove loose material, inspect the structure, and use a compatible repair compound. Check the wall again after temperature changes.

What hidden causes can create a recurring ceiling stain?

Possible causes include a roof gap, blocked drainage, or a concealed pipe leak. Water may travel along a ceiling support before appearing indoors. Photograph the stain after rain. Check nearby joints, odors, and moisture levels before repainting.

How can moisture be detected before repairing a surface?

Look for damp baseboards, soft flooring, peeling paint, and musty odors. A moisture meter can reveal dampness that feels dry. Do not seal it yet. Inspect plumbing, windows, exterior joints, and drainage paths. Allow the area to dry fully before applying paint or sealant.

Why do sealants, adhesives, or patches fail?

Dust, loose material, and trapped moisture can prevent proper bonding. The chosen product may also be unsuitable for the surface. Clean and dry the substrate completely. Follow temperature, ventilation, and curing instructions. Rushing often causes another failure.

How should a recurring leak be investigated?

Start with evidence rather than assumptions. Note when the leak appears, especially after rainfall, water use, or temperature changes. Check nearby fittings and drainage safely. Open a small inspection area only when appropriate. Persistent water problems require a qualified professional.

What should be recorded during a home repair?

Keep dated photographs, short notes, materials used, and test results. Record whether the area stayed dry after rain or water use. Memory is unreliable. These records can reveal repeated patterns and show whether the repair actually worked.

How can repair performance be verified?

Test the fixture, inspect beneath nearby sinks, and examine the wall after rainfall. Check repaired areas again after curing. Look closely. An infrared camera may reveal cold or wet sections that appear normal. A checklist helps, but one inspection can still miss a hidden problem.

When should a qualified professional inspect the repair?

Seek qualified help for electrical, structural, gas-related, or persistent moisture problems. Ask what evidence supports the diagnosis. Replacement is not always the answer. I have sometimes trusted a smooth patch too quickly. A clear inspection should explain the failure mechanism, not only suggest new materials.

Conclusion

Home repairs can fail repeatedly when the visible damage is treated without addressing the underlying cause. This guide explains why do home repairs keep failing after fixing and shows how to investigate recurring problems by checking moisture, structural movement, poor materials, incorrect installation, hidden damage, temperature changes, and inadequate maintenance. Identifying patterns such as returning cracks, leaks, loose fixtures, or peeling surfaces can help reveal whether the issue is isolated or part of a larger system.

It also presents seven common reasons repairs do not last and offers step-by-step methods for creating more durable solutions. These include inspecting the area carefully, finding the source of the damage, preparing surfaces properly, choosing suitable materials, following correct repair procedures, testing the result, and scheduling preventive maintenance. When problems continue despite careful work, the guide explains when professional help is necessary, especially for complex structural, electrical, plumbing, or safety-related concerns.

Charlotte

Charlotte

Charlotte is a seasoned marketing professional with a deep understanding of the company's portfolio and a passion for elevating its presence in the market. With a keen eye for detail and a commitment to excellence, she ensures that our professional blog is regularly updated with insightful articles......